Enabling Cloud Recording
- Sign in to the Zoom web portal as an administrator with the privilege to edit account settings, and click Account Settings.
- Navigate to the Recording tab and verify that the Cloud Recording setting is enabled.
Note: If the setting is disabled, click the toggle to enable it. If a verification dialog displays, click Turn On to verify the change.

For more in-depth instructions on Zoom Cloud Recordings, please head to this link:
Zoom Cloud Recordings
Starting a Cloud Recording
Note: Only hosts and co-hosts can start a cloud recording. If you want a participant to start a recording, you can make them a co-host. Recordings started by co-hosts will still appear in the host's recordings in the Zoom web portal.
If you unfamiliar with Zoom videoconferencing, review this article to get started.
To record a meeting to the cloud:
- Start a meeting as the host.
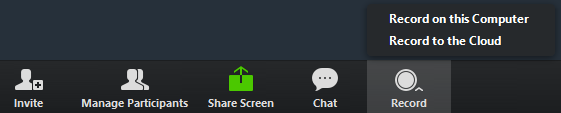
- Click the Record button in the Zoom toolbar.
- Select Record to the Cloud to begin recording.
- To stop recording, click Pause/Stop Recording or End Meeting.

Once the recording has been stopped, the recording must be processed before viewing it. Zoom will send an email to the host's email address when the process is completed.
- To manage your cloud recordings, visit https://westernu.zoom.us/ and use your WesternU credentials to sign in.